Table of Contents
- The Calm Before the Storm: Scotland on the Eve of 1298
- The Rise of William Wallace: From Local Hero to National Icon
- The Struggle for Scottish Independence: A Nation Under Siege
- Setting the Stage: The Strategic Importance of Falkirk
- The English Army Arrives: Edward I’s Resolve to Suppress Rebellion
- The Scottish Preparations: Defiant but Unequal
- Dawn of July 22, 1298: The Battle Begins
- The Clash of Titans: Scottish Schiltrons vs. English Cavalry
- The Turning Point: The Arrival of English Longbowmen
- Breaking the Shield Wall: The Fall of the Scottish Defense
- William Wallace's Narrow Escape: The Aftermath on the Battlefield
- Casualties and Cost: The Human Toll of Falkirk
- The Political Shockwave: Impact of the Defeat on Scottish Morale
- Edward I’s Triumph and the Next Phase in the Wars of Scottish Independence
- Wallace’s Legacy After Falkirk: From Warrior to Martyr
- The Battle in Memory: How Falkirk Shaped Scottish Identity
- Tactical Lessons and Innovations: Medieval Warfare Revisited
- Falkirk in Popular Culture: From Chronicles to Cinema
- Conclusion: The End of an Era and the Birth of a Legend
- FAQs: Common Questions About the Battle of Falkirk
- External Resource: Wikipedia Link
- Internal Link: Visit History Sphere
The Calm Before the Storm: Scotland on the Eve of 1298
The morning mist hung low over Falkirk’s rolling fields, veiling the quiet Scottish town in an almost serene hush. Yet beneath this deceptive calm, tension simmered—a tension born from years of mounting defiance and desperation. It was July 1298, and Scotland stood at a perilous crossroads. The proud land, scarred by earlier skirmishes and the iron grip of England’s ambitions, braced itself for confrontation. Two decades of turmoil had etched deep lines into the hearts of its people—the yearning for freedom colliding violently with the unyielding might of Edward I, England’s formidable warrior king.
The fields around Falkirk, once a patchwork of peaceful farmland, would soon tremble beneath the thunder of hooves and the clamor of steel. Men from both sides—knights, archers, and foot soldiers—prepared to test their mettle in one of the most momentous battles woven into the fabric of the Wars of Scottish Independence.
The Rise of William Wallace: From Local Hero to National Icon
The story of the battle is inseparable from the legend of William Wallace, the guardian of Scotland’s hope. A relatively obscure nobleman turned rebel leader, Wallace had become the living embodiment of resistance against English domination. His fiery spirit was kindled amid personal tragedy and collective persecution. By 1297, after the brutal invasion of Scottish lands and the execution of many leaders, Wallace emerged from the shadows.
His remarkable victory at the Battle of Stirling Bridge the previous year had sent shockwaves through both kingdoms—an audacious defeat that embarrassed Edward I and invigorated Scottish resistance. Wallace’s charisma and tactical brilliance galvanized a nation, his name whispered on the lips of peasants and nobles alike.
Yet, the path ahead was fraught with peril. While Stirling was a triumph born of cunning strategy and terrain advantage, the might of England’s military resources was still vast. The struggle was far from over.
The Struggle for Scottish Independence: A Nation Under Siege
At the heart of the conflict lay Scotland’s struggle to assert its sovereignty. Edward I, dubbed “Longshanks” for his imposing stature, regarded the Scots not as equals but as rebellious subjects. After the death of King Alexander III and the subsequent succession crisis, Edward had inserted himself as overlord, demanding fealty.
The Scots, however, chafed under this foreign yoke. The early rebellions were fragmented, but they coalesced around figures like Wallace and, later, Robert the Bruce. National identity, barely crystallized before, hardened on these battlefields.
By mid-1298, years of intermittent warfare, brutal scorched-earth tactics, and devoted patriotism had left the land exhausted but unbowed. It was a war of attrition, wills pitted against armies.
Setting the Stage: The Strategic Importance of Falkirk
Falkirk, strategically positioned in the Central Lowlands, lay at the crossroads of vital routes linking Edinburgh, Stirling, and the English border. Control of this area meant dominance over movement and communication—a critical advantage in medieval warfare.
For Edward I, reclaiming Falkirk was more than a military objective; it was symbolic. To crush the rebellion here would send a message: resistance was futile. For the Scots, holding ground at Falkirk meant keeping alive the fragile hope for freedom.
The battlefield itself was a blend of open fields interspersed with marshes and gently rolling hills—a landscape that would play a pivotal role in shaping the battle’s outcome.
The English Army Arrives: Edward I’s Resolve to Suppress Rebellion
Edward I approached Falkirk with an army reputed to be one of the most disciplined and well-equipped of its time. His forces comprised thousands of men-at-arms, heavily armored cavalry, and—importantly—the dreaded English longbowmen, whose bows could rain devastating hail of arrows over enemy lines.
“I come not as a conqueror, but as an avenger of law and order,” Edward proclaimed, his iron gaze fixed on the looming Scottish opposition.
For months, Edward meticulously planned his campaign, drawing reinforcements from across England and Wales. His leadership was relentless, reflecting his obsession with quelling the Scottish revolt once and for all.
The Scottish Preparations: Defiant but Unequal
Opposite Edward’s well-oiled army stood the Scottish forces, led by William Wallace. Though pride and valor surged through their ranks, the Scots were a patchwork assembly—clansmen, knights, and commoners united more by cause than by uniform discipline or military might.
Aware of the English strength, Wallace opted for the proven defensive formation: the schiltron. These tightly packed circles of spearmen, resembling giant hedgehogs bristling with pikes, had inflicted heavy losses on English knights at Stirling Bridge.
Yet, Wallace’s army was outnumbered and less equipped. Their hope hinged on holding firm, repelling cavalry charges, and enduring until the enemy’s resolve faltered. The fate of Scotland seemed to rest on a knife’s edge.
Dawn of July 22, 1298: The Battle Begins
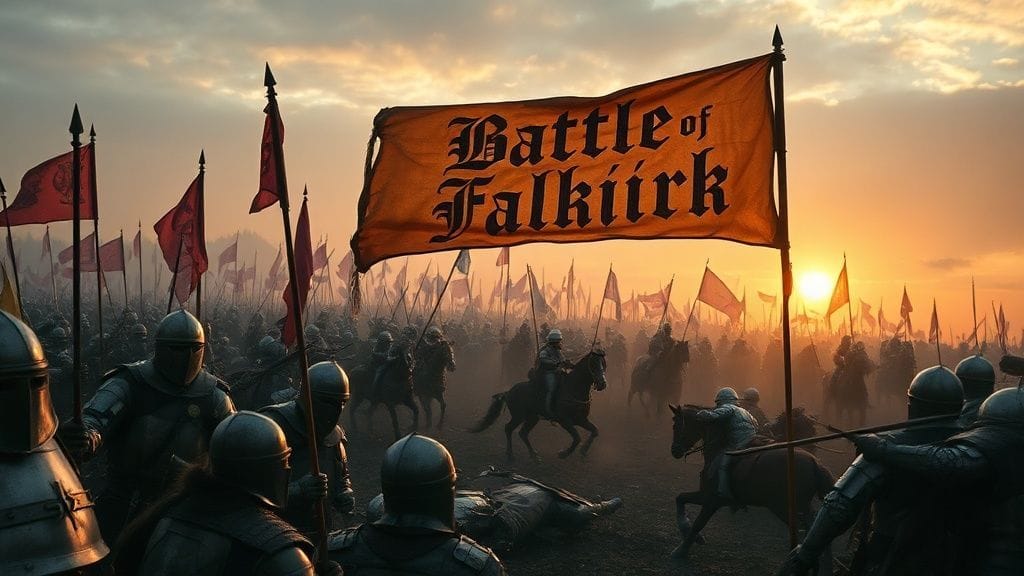
As dawn broke on July 22, the sun pierced the morning fog, illuminating two armies poised for war. The low murmur of prayers, the clanking of armor, and the jittery shuffle of feet blended into a taut silence.
The Scottish schiltrons took their positions on the southern edge of the battlefield, near marshy ground that limited English cavalry maneuverability. Spears were planted, shields raised, and hearts steeled.
Edward’s forces advanced with confidence, banners fluttering, drums pounding a relentless beat. The English longbowmen took positions behind the infantry, ready to unleash a deadly storm.
Then, with a guttural roar, the armies collided.
The Clash of Titans: Scottish Schiltrons vs. English Cavalry
The initial engagement was a brutal contest of strength and discipline. Scottish spearmen stood shoulder to shoulder, their pikes forming a bristling wall impervious to cavalry charges. Time and again, English knights thundered toward the schiltrons, only to be repelled by the steadfast defenders.
For a moment, it appeared that history might repeat itself: a Scottish victory reminiscent of Stirling. The schiltrons held firm, their unity a testament to Wallace’s leadership and the soldiers’ unwavering spirit.
But Edward’s army was not to be underestimated.
The Turning Point: The Arrival of English Longbowmen
The battle’s fate twisted with the decisive intervention of the English longbowmen. From their hidden vantage points, they began to launch a withering hail of arrows over the Scottish ranks.
Unlike the heavy knights, these archers required no direct engagement; their bows were weapons of attrition and terror. The volleys tore through the front lines, puncturing shields and flesh alike, sowing chaos and fear.
The schiltrons, designed to counter cavalry, lacked the flexibility to respond effectively to this airborne threat. As arrows rained down, the formation loosened, and cracks appeared in the once-solid defense.
Breaking the Shield Wall: The Fall of the Scottish Defense
Exploiting the weakening schiltrons, Edward’s cavalry circled and struck at vulnerable flanks and rear positions. The disciplined English infantry closed in, hammering the Scots with swords and axes.
What began as a stalwart defense soon descended into disarray. Panic spread as soldiers broke ranks, fleeing the nightmare of encirclement.
William Wallace himself narrowly escaped capture, his horse crashing through enemy lines under a hail of arrows, a figure of both desperation and defiance.
By the afternoon, the battlefield was strewn with the fallen—bodies, broken weapons, and the shattered hopes of a nation.
William Wallace's Narrow Escape: The Aftermath on the Battlefield
Amidst the carnage, Wallace’s survival became legend. Though his army was scattered and defeated, he had not been taken. Accounts describe his grievous injuries and the harrowing journey back to safety.
His escape was both a personal victory and a bittersweet symbol: the fight for Scotland’s freedom continued, but the cost was staggering.
The battlefield at Falkirk stood silent save for the cries of the wounded and the ominous shadows of defeat.
Casualties and Cost: The Human Toll of Falkirk
Estimates suggest that Scottish casualties numbered in the thousands—far exceeding those of the English. Nobles and commoners alike lay dead or captive, their sacrifice marking one of the bloodiest chapters of the Wars of Independence.
Families mourned men who had given their lives for a cause greater than any one individual. England’s dark victory cast a pall of sorrow over the Highlands and Lowlands alike.
The battle was more than a military engagement: it was a collective trauma, a pivot point searing itself into the Scottish consciousness.
The Political Shockwave: Impact of the Defeat on Scottish Morale
Wallace’s defeat at Falkirk sent shockwaves through Scottish society and its leadership. Confidence wavered, and some nobles reconsidered their commitment to open rebellion.
King Edward’s claim over Scotland seemed solidified, at least temporarily. The dream of independence appeared threatened by the overwhelming power of England’s military machine.
Yet, the defeat galvanized others, sowing seeds for future leaders and uprisings, reminding the Scots that freedom, though costly, was worth the fight.
Edward I’s Triumph and the Next Phase in the Wars of Scottish Independence
For Edward I, Falkirk was a triumph—a powerful display of his military might and strategic acumen. But victory did not yield lasting peace.
The war dragged on, morphing into a protracted conflict marked by guerrilla resistance and shifting allegiances. The English occupation proved difficult to maintain, and dissidence simmered beneath the surface.
Falkirk was a battle won, but not the war.
Wallace’s Legacy After Falkirk: From Warrior to Martyr
In the years following Falkirk, William Wallace’s legend grew exponentially. His survival and continued resistance made him a symbol of unwavering Scottish defiance.
His eventual capture and execution in 1305 transformed him into a martyr, his story inspiring generations to come.
His name would echo through centuries—recounted in ballads, chronicled by historians, and immortalized in the collective memory of Scotland.
The Battle in Memory: How Falkirk Shaped Scottish Identity
Falkirk was etched deeply into Scottish cultural and historical identity. It symbolized not just defeat, but the fierce spirit of a people unwilling to surrender.
The battle became a reference point in discussions of courage, sacrifice, and national pride.
It fortified a collective will that would later resurface in Scotland’s repeated struggles for sovereignty.
Tactical Lessons and Innovations: Medieval Warfare Revisited
Beyond its immediate political consequences, Falkirk provided crucial lessons in military tactics. The schiltron had proven vulnerable without protection from missile troops, highlighting the growing importance of archery and combined arms.
Edward’s use of longbowmen signaled a shift in medieval warfare—powerful ranged units could decisively alter the battlefield.
Falkirk thus stands as a pivotal moment reflecting the evolution of combat during the late 13th century.
Falkirk in Popular Culture: From Chronicles to Cinema
From medieval chroniclers like Walter of Guisborough to modern historians and filmmakers, Falkirk’s drama has captivated storytellers.
It inspired narratives emphasizing heroism and tragedy, prominently featuring in literary works and the 1995 film Braveheart, which, while historically romanticized, brought Wallace and Falkirk to global attention.
These retellings ensure that the battle’s resonance endures well beyond textbooks.
Conclusion: The End of an Era and the Birth of a Legend
The Battle of Falkirk was more than a military encounter—it was a clash of wills, an epic painted in the blood and sweat of those who dared to dream of freedom.
Though the Scots suffered a devastating defeat, Falkirk carved William Wallace into the annals of history as a hero forged by adversity.
The scars of that day shaped Scotland’s destiny, reminding future generations that the path to liberty is often wounded but never surrendered.
History remembers Falkirk not only for its loss but for the undying flame it kindled in the heart of a nation.
FAQs: Common Questions About the Battle of Falkirk
Q1: What were the main causes of the Battle of Falkirk?
The battle was primarily caused by the ongoing Scottish resistance against English attempts to dominate Scotland after the death of King Alexander III. William Wallace led a rebellion aiming to preserve Scottish independence, while Edward I sought to suppress it.
Q2: Who was William Wallace, and why was he significant?
Wallace was a Scottish knight and leader who became a symbol of resistance against English rule. His leadership embodied Scottish aspirations for sovereignty, particularly after his victory at Stirling Bridge.
Q3: Why did the Scottish forces lose at Falkirk despite their strong defense?
While the Scottish schiltrons were effective against cavalry, they were vulnerable to concentrated arrow attacks. The English longbowmen devastated the Scottish formations, which then collapsed under cavalry and infantry assaults.
Q4: What were the immediate consequences of the battle for Scotland?
The defeat severely weakened Scottish military and political strength, leading to the temporary reassertion of English control, but it did not end the struggle for independence.
Q5: How did the battle influence medieval warfare tactics?
Falkirk highlighted the effectiveness of combining infantry, cavalry, and especially ranged units like longbowmen, signaling a shift towards more integrated battlefield tactics.
Q6: How is the Battle of Falkirk remembered in Scotland today?
It is remembered as a defining moment of courage and sacrifice, symbolizing Scotland's long and arduous fight for freedom.
Q7: Did William Wallace survive the battle, and what happened to him later?
Yes, Wallace escaped Falkirk but was later captured in 1305 by the English and executed. His martyrdom solidified his place as a Scottish national hero.
Q8: How accurately does popular culture portray the Battle of Falkirk?
Popular portrayals often romanticize or dramatize events for storytelling purposes, sometimes deviating from historical facts, but they help keep the memory of Falkirk alive in the public imagination.


